Day 3
Controls
Today we’ll be making controls for the player and getting into scripting with C#.
Adding Control To The Scene
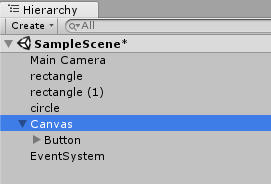
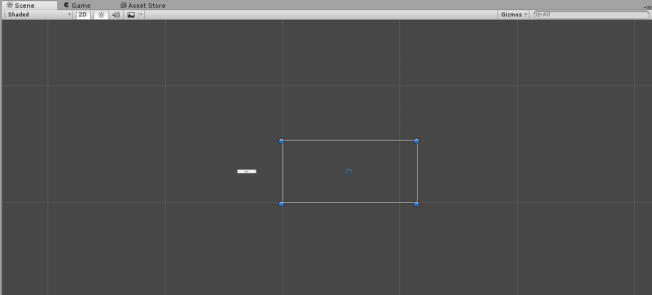
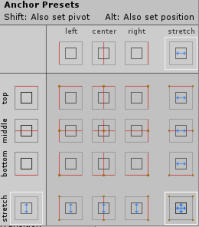
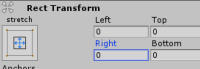
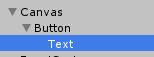
Currently, we don’t have anything in the game we can interact with. It’s pretty much just an image or an animation that we can watch. If we want something to happen when we e.g. tap the screen of our phone, there needs to be something like a virtual button that registers that tap. Let’s add that button! Go to GameObject menu, then select UI (for user interface) and Button. As you can see in the Hierarchy tab, this adds both a Canvas object and Button object to the Scene. This is great! We need them both. Canvas is the area inside which we can add user interface objects. Button is a user interface control that can be pressed down and released. UI objects can be a bit tricky to work with because the way they appear in the editor is way larger than how they appear in the game. You probably noticed that you can’t see the button you added anywhere on the screen. Double-clicking items in the Hierarchy tab moves the focus in the Scene tab into that object. Go ahead and double-click the Canvas object in the Hierarchy tab. Now you can see the Canvas area and the button in the Scene tab. You can think the white rectangle representing the borders of the screen of your device. If you want to get back to the previous view, double-click the Main Camera object in the Hierarchy tab. My button is located way off the Canvas area. I also want the button to cover up the whole screen. This way, the player can tap any part of the screen and it will get registered. So, I select the button in the Hierarchy. Now I can change the size and position of it in the Inspector. First of all, let’s change the Anchor Presets by clicking the “middle/center” square and selecting the option in the bottom-right corner that stretches the button both horizontally and vertically. If we now set all left, right, top, and bottom transforms to 0, the button will fill out the whole canvas. The problem is that if you now play the game, you can’t see anything except the button. We need to do two things to fix this issue. First, go to the Inspector tab and locate the Color setting in the Image (Script) component. Clicking that opens up a color selector window. Here you’ll see four values R, G, B (for Red, Green, Blue), and A (for Alpha). If you turn the A all the way to zero, the button image will become invisible. You could also get rid of the image component altogether, but then the clicks wouldn’t get registered at all. So, let’s leave it as it is. Second, go to the Hierarchy tab and click the small arrow next to the Button object. This reveals a Text object underneath the Button. We can safely delete this object so that we don’t get strange texts floating on our screen.Scripting Application
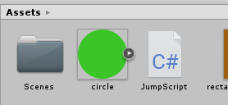
For scripting purposes, you’ll need to install a code editor. Your best choice is Visual Studio because it’s officially supported by Unity. Luckily, the Community Edition of Visual Studio is free even for small studios. The package might be a bit large, but that’s how the industry tools are. Get Visual Studio Community for free here. Once you’ve got Visual Studio installed, we can start adding some functionality to our game. Go to the Assets menu and select Create and C# Script. (C# is the programming language used for scripting in Unity.) This will make a new script file in the Project tab. Let’s call this one JumpScript.C# Programming Language
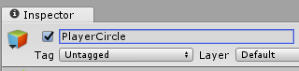
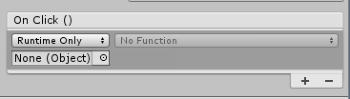
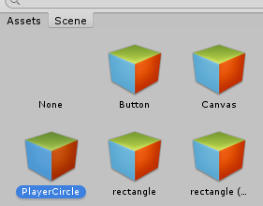
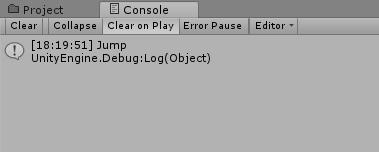
Double-clicking the JumpScript will open up Visual Studio and display you the code inside the file. It should look very similar to the code below… Keywords The words that are highlighted with a color (in this case blue) are called keywords. They form the rules around which the programming revolves. using keyword allows the script to access content in other libraries. For an example, UnityEngine is a library that contains functionality we can now access to use the engine. public class keywords define a class that’s in this case called JumpScript. Classes are a bit out of scope for this guide, but think of it as a container, similar to the Canvas object. You can write code inside the curly braces of the class. Anything inside this block belongs to that class. The code can sometimes be accessed using the name of the class. Inside the class block we have two other blocks, Start and Update. These ones are created by Unity, because they are often used with script files. However, they are very much optional. In fact, we’re not going to use them right now. Instead, let’s make a new block inside the class. These blocks that go inside classes and have names are known as methods. We’ll create a new method and call it JumpClick. It’s important to keep testing everything you make so that you’ll know if what you’ve created works the way you intended. If you keep adding new things and never test, then you might find out that everything is broken and you have no idea what’s causing the problem. So, inside JumpClick method I just want to print out some text. If the text gets printed out successfully, then I’ll know that the clicking mechanism works correctly. Text is printed to console by using Debug.Log functionality like this… The script is now done. But how will the button know to call this script? We’ll have to hook it up. Select the player circle. We’ll be able to locate this object more easily if we name it properly. So, at the very top of the Inspector tab, change the name of the object to PlayerCircle. Next, let’s add the script we just made as a component for the PlayerCircle. Click the Add Component button at the bottom of the Inspector tab and type in jump. Unity should offer you Jump Script as the very first result. Click it. Now the script is hooked up to the player. But we still need to hook it up to the button. Select the Button in the Hierarchy tab. Now, if you look at the Inspector tab, you should see a Button (Script) component. At the bottom of this component there is a section for events. The button only has one event: On Click (). This is the one we need to setup. We want the On Click event to execute the JumpClick method that is inside the JumpScript that is a component of the PlayerCircle object. With this in mind, let’s first hand the PlayerCircle object to the event. Locate a field that says None (object) and click the tiny circle button next to it. This opens up a Select Object window. Inside this window there’s a Scene tab that lists all the objects already inside the Scene. Go there and select the PlayerCircle. Now we can go back to the event and hand it a method connected to the PlayerCircle. Click the dropdown menu that says No Function, then JumpScript, and finally JumpClick (). Now the method is hooked up to the On Click event of the button. You might remember me mentioning that Debug.Log would print text inside the console. But where is the console? By default, it’s next to the Project tab, at the bottom of the screen. Open it up. Now, if you play the game and click the screen with your mouse, a message gets printed to the console. We now know that our button works. Congratulations! You made it to the end of Day 3. We’re starting to get to interesting territory.
using System.Collections;
using System.Collections.Generic;
using UnityEngine;
public class JumpScript : MonoBehaviour {
// Use this for initialization
void Start () {
}
// Update is called once per frame
void Update () {
}
}

public void JumpClick () {
Debug.Log("Jump");
}

If you have feedback or questions drop a note
on Twitter.