Day 2
Prototype
Let’s get down to business.
As we learned yesterday, building a prototype as quickly as possible is really important. If
you can’t test your game, you won’t know if it’s fun to play.
A lot of game development is making changes to the project and then testing them. That’s
why it takes so damn long to get anything finished.
Two Minds of a Developer
You have to have two mindsets for game development. Otherwise you’ll never get anything done. The first mindset is this messy person who splashes paint everywhere, super-glues googly- eyes on everything, and adjusts lighting by breaking holes to the walls. The second mindset is a super careful and organized person who puts everything to its designated place, cleans up all the crumbs from the table after eating, and synchronizes the bathroom schedule. You need Mindset 1 because you have to get something to work. You need to brute force things into motion. You need to get color on the background so you can see what the characters look like. You need to roll your face on the keyboard so that all the important variables have some values so that the game can be tested. But if you don’t have Mindset 2, things will get out of control. Fast! Soon, everything will be just a chaotic mess. You won’t know where to start typing your next line of code. You won’t know what art should go where. When you encounter a bug, you won’t know what caused it… and why fixing it broke five other mechanics. By all means, be down and dirty to get work done. But once you’ve got something working, it’s time to clean up, organize, and refactor. Then you’ll have a nice platform on which you can create another mess. On the other hand, if you’re afraid to make a mess, if you’re contemplating on that perfect line of code, you’ll never, EVER, get anything done. Something finished is better than something elegant. There’s always time to clean it later.Game Engine
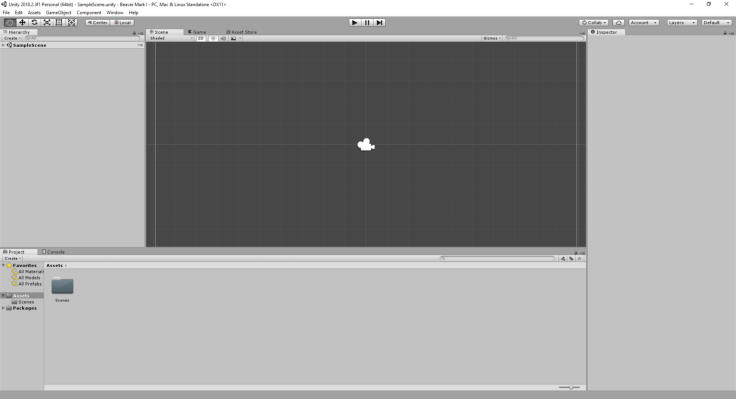
Games, not unlike cars, are built on top of engines which do a lot of the heavy lifting for you. Engines are like the machinery in a factory. If you’ve got a cake factory, you probably own a lot of machines that do everything for you from measuring the ingredients to packing up the cakes in pretty packages. Everything, except designing the cake. Many people (me included, once upon a time) feel like they need to build everything themselves. But let me tell you, if you’re a cake-maker, don’t start building the machines. Somebody else probably can make them for you. Somebody with incredible amount of experience in machinery. Which brings us to Unity. We are going to use Unity because it is light-weight, easy to use, and has a great community built around it. There are other options we could consider (Unreal Engine, Godot, GameMaker), but that is a bit out of scope for this guide. Unity works well for this project and that is good enough. Get your copy of Unity here. It is completely free. Once you’ve installed Unity, open it up and create a new 2D project. You should see a screen similar to the one below. This guide doesn’t go too deep into how everything in Unity works for a couple of reasons. First of all, it would make the guide way too long to be finished in seven days. And second, I don’t think you necessarily need to know everything about Unity to be able to make games with it.Workflow
I’ll repeat this again. Get to a prototype as quickly as possible. If I ask you “why?” can you answer it already? Answer: Games are experienced by playing them. You can’t evaluate them unless you’ve got something you can play. If you work on the game for three months before testing it for the first time, you might find out that the game is boring and can’t be fixed. That’s time you could have spent on another game project. So, the question at this point is, what do we absolutely need? Games have two important elements without which they don’t really work. 1. Visuals 2. Mechanics If you don’t have a story, the game can still be played. If you don’t have music or sound effects, the game can still be played. But if you remove mechanics or visuals, it won’t be a video game anymore. When it comes to art, though, do you need to have the finalized art to be able to tell if the game is fun to play? Without underestimating the importance of beautiful graphics, I would argue that many games can be very much enjoyed even with bare-bones representations of the real art. In some sense, all game graphics are representations of the real world. Would Minecraft be more fun if it had ultra-realistic graphics? Perhaps. The point is more that you don’t necessarily need fancy graphics to tell if a game could be fun. You might need to use your imagination a bit. But if the game is fun with rectangles and circles, just imagine how much better it’s going to be with the final artwork. Besides, rectangles and circles are faster to make. If you can build a prototype of your game by using simple shapes, then I urge you to do just that. It will save you a ton of time. We’ll talk about art later on, but for now, I’m going to use shapes to represent the game objects.Importing Assets
You can use whatever images you can get your hands on, because the idea of placeholders is that you will replace them later. I will create myself two PNG image files. One is a rectangle that represents an obstacle and another one is a circle that will become our player. When I have the files saved on my drive, I can import them into my game project by going to the Assets menu and selecting Import New Asset. Then select both files on your drive and they will appear in the Project tab.Adding Assets To The Game
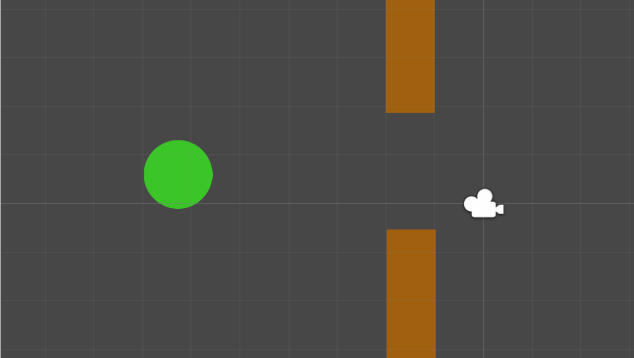
Once the images are in the Project tab, they can be dragged and dropped into the Scene that’s located in the middle of the screen. As you can see, the green circle represents the player and the rectangles are the obstacles.Gravity
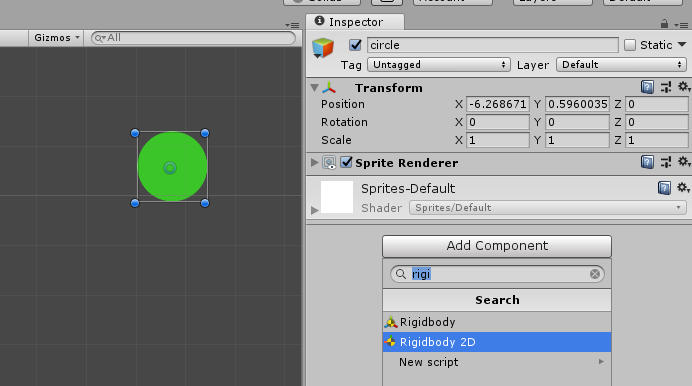
Currently, it’s not much of a game. You probably could’ve done the same thing in Microsoft Word. Let’s do one final thing today to get something moving on the screen. Let’s add some gravity! Select the player image inside the Scene. You’ll notice that Unity gives you a lot of information about the little guy on the right side of the screen in a tab called Inspector. On the very bottom of the Inspector you’ll see a button that says “Add Component”. We’re going to add a Rigidbody2D component to the player. Start typing “rigidbody” in the search field that pops up and you should see Rigidbody 2D returned as one of the results. Click it. That’s it. Now, if you start the game by pressing the Play button at the top of the screen, you can witness the player character dropping down the screen like a regular beaver. (Stop the game by pressing the Play button again.) It’s not much, but we’re getting somewhere. Congratulations for finishing Day 2!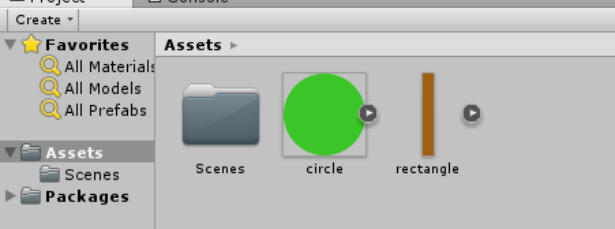


If you have feedback or questions drop a note
on Twitter.